7 Easy Hiking Snacks You Can Make at Home
A good hiking snack should do more than stop your stomach from rumbling. The best trail snacks are easy to pack, travel well, give you lasting energy and, most importantly, are something you actually enjoy eating.
Making your own hiking snacks at home can also be a great way to save money and avoid relying on highly processed commercial snacks.
Here are seven simple trail snack ideas that are easy to prepare before your next hike.
A note on storage: Some of these snacks are best suited to day hikes or the first day of a multi-day trip. Always consider the ingredients, weather and storage conditions before packing homemade food for several days on the trail.
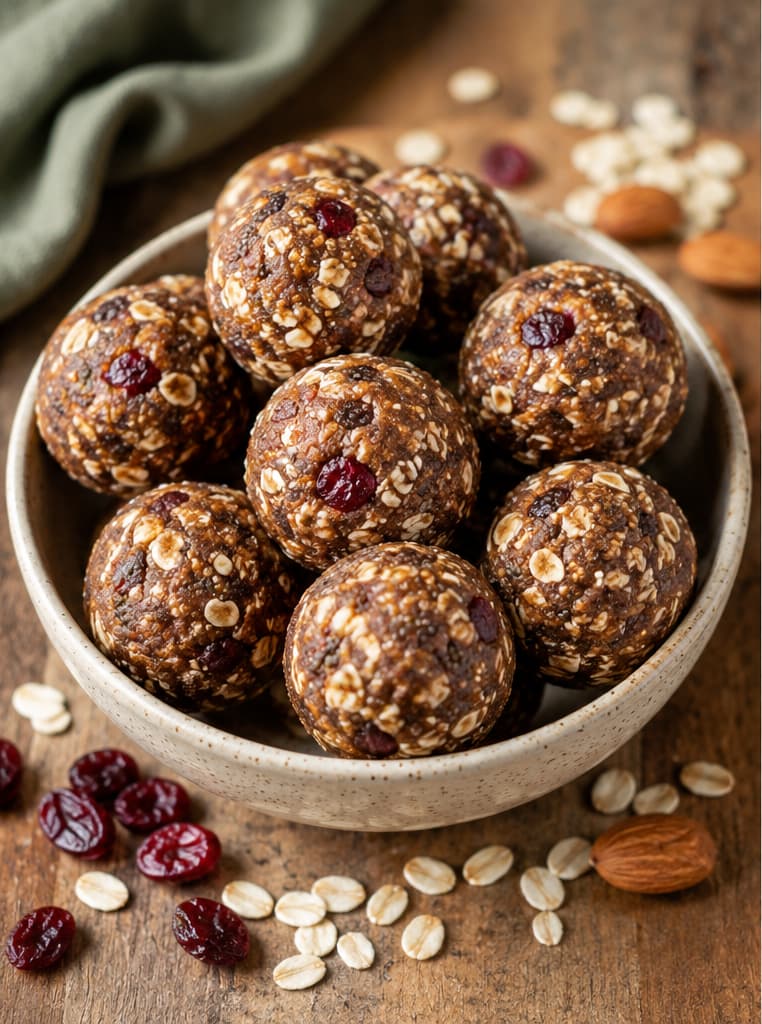
1. Homemade Energy Bites
Energy bites are one of the easiest hiking snacks to make. They’re compact, filling and easy to customise depending on what you have in the pantry.
Makes: about 12–14 bites
Prep time: 15 minutes
Ingredients
- 100 g rolled oats
- 100 g smooth peanut butter
- 100 g pitted dates
- 30 g desiccated coconut
- 30 g chopped peanuts or almonds
- 15 g pumpkin or sunflower seeds
- ½ tsp cinnamon
- 1–2 tbsp water, only if needed
Method
- Place the dates in a food processor and process until they form a sticky paste.
- Add the peanut butter and cinnamon and pulse until combined.
- Add the oats, coconut, chopped nuts and seeds. Pulse briefly until everything is evenly mixed and the mixture holds together when pressed.
- If the mixture seems too dry, add a tablespoon of water and mix again. Add the second tablespoon only if necessary.
- Roll into small balls, about the size of a walnut.
- Place in the fridge for 30 minutes to firm up.
Trail tip: These are best for day hikes or the first day of a multi-day hike. Because they contain peanut butter and moisture from the dates, keep them cool and don’t treat them as a shelf-stable food for several days.
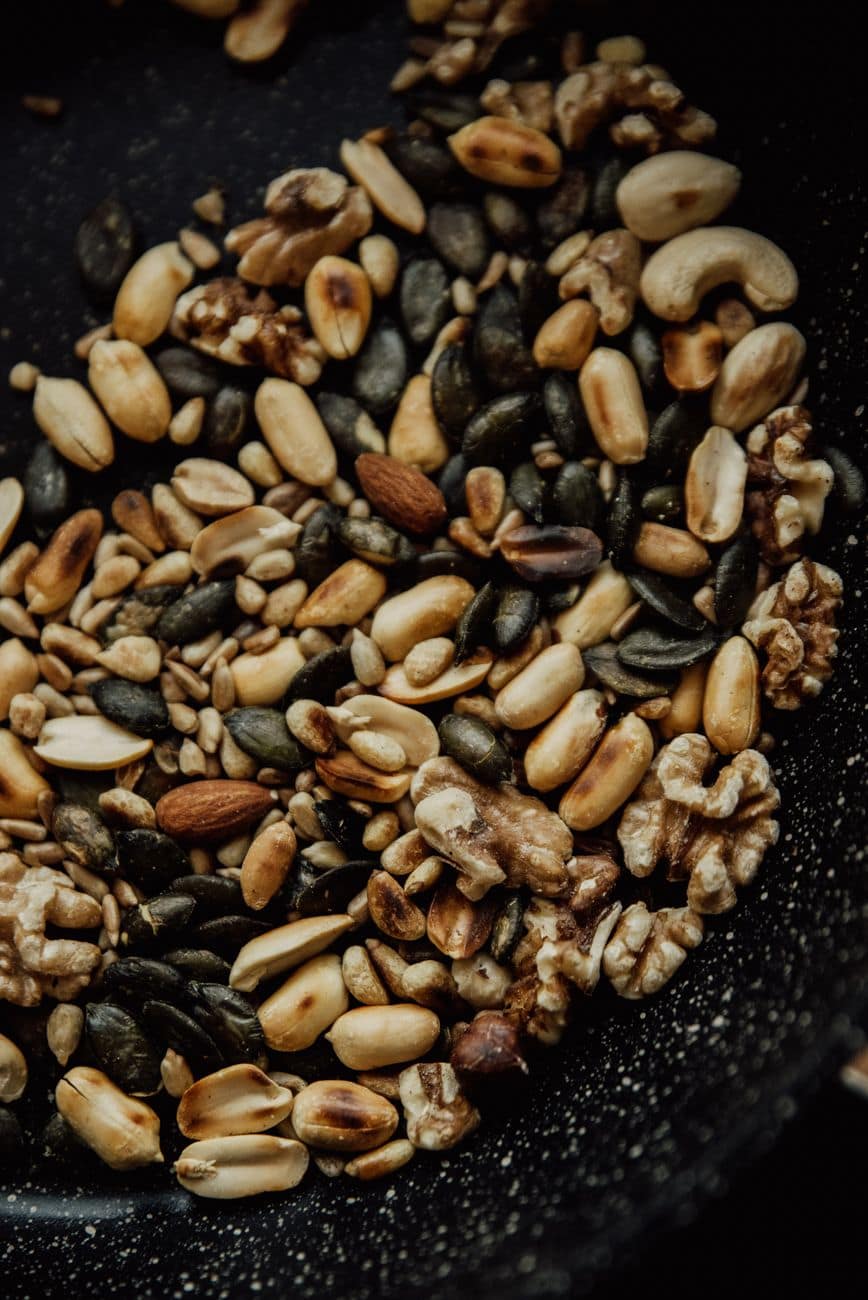
2.Homemade Trail Mix
I’d suggest:
Makes: about 5–6 trail portions
Prep time: 5 minutes
Ingredients
- 150 g peanuts or almonds
- 75 g cashews
- 50 g pumpkin seeds
- 50 g sunflower seeds
- 100 g raisins or dried cranberries
- 75 g dried mango or dried apple, chopped into bite-sized pieces
- 25 g coconut flakes
- 50 g dark chocolate chips or chopped dark chocolate
- ½ tsp flaky sea salt
Method
- Add all the ingredients to a large bowl.
- Mix well until everything is evenly distributed.
- Taste and adjust the combination to suit you. Add more dried fruit if you prefer it sweeter, or more nuts and seeds for a more savoury, filling mix.
- Divide into individual portions and pack into small resealable bags or containers.
Trail tip: Portion your trail mix before you leave home. A handful here and there can very quickly turn into half a bag, so having individual portions makes it much easier to keep track of how much you’re eating during the day.x into individual bags so you can grab one when you need it.
3. Spiced Roasted Chickpeas

Spiced Roasted Chickpeas
Makes: about 4 trail portions
Prep time: 10 minutes
Cook time: 35–45 minutes
Ingredients
- 2 × 400 g cans chickpeas, drained and rinsed
- 1 tbsp olive oil
- 1 tsp smoked paprika
- ½ tsp ground cumin
- ½ tsp garlic powder (optional)
- ¼ tsp chilli powder, or to taste
- ½ tsp flaky sea salt
- Freshly ground black pepper
Method
- Preheat the oven to 190°C.
- Drain and rinse the chickpeas thoroughly. Spread them onto a clean tea towel or paper towel and dry them really well. Removing as much surface moisture as possible is important for getting them crunchy.
- Spread the chickpeas in a single layer on a baking tray. Roast for 15 minutes without oil or seasoning.
- Remove from the oven and carefully toss with the olive oil, smoked paprika, cumin, chilli, salt and pepper.
- Return to the oven and roast for another 20–30 minutes, shaking the tray every 10 minutes, until the chickpeas are deeply golden and crisp.
- Turn off the oven and leave the chickpeas inside with the door slightly open for 10–15 minutes. This helps drive off any remaining moisture.
- Allow them to cool completely before packing.
Trail tip
Don’t pack roasted chickpeas while they’re still warm. Any trapped steam can create condensation and soften them. Once completely cool and crisp, pack them in an airtight container or small resealable bags.
For a multi-day hike: Make sure they are genuinely dry and crunchy before packing. If they are soft in the centre, they contain more moisture and won’t have the same shelf life.
Try these variations:
🌶️ Chilli & Lime — chilli powder + lime zest
🌿 Herby — dried oregano + rosemary
🧂 Salt & Vinegar — vinegar powder + sea salt
🔥 Smoky BBQ — smoked paprika + cumin + a pinch of chilli
4. Homemade Granola Bars
I’d make these chewy rather than crunchy. They’re less likely to crumble all over your pack, and they’re easier to eat while walking.
Makes: 10–12 bars
Prep time: 15 minutes
Bake: 20–25 minutes
Ingredients
- 200 g rolled oats
- 75 g mixed nuts, roughly chopped
- 50 g pumpkin or sunflower seeds
- 50 g desiccated coconut
- 75 g dried fruit, such as cranberries, raisins or chopped apricots
- 60 g smooth peanut butter
- 80 g honey
- 40 g butter or coconut oil
- ½ tsp cinnamon
- ½ tsp flaky sea salt
- 1 tsp vanilla extract
Method
- Preheat the oven to 170°C.
- Line a square or rectangular baking tin with baking paper, leaving some overhang to make the bars easy to remove.
- Combine the oats, nuts, seeds, coconut, dried fruit, cinnamon and salt in a large bowl.
- Gently warm the peanut butter, honey and butter or coconut oil in a small saucepan over low heat. Stir until smooth and well combined. Don’t boil.
- Remove from the heat and stir in the vanilla.
- Pour the warm mixture over the dry ingredients and mix thoroughly. Everything should be evenly coated.
- Tip into the prepared tin and press down very firmly with the back of a spoon or the bottom of a glass. This is important — firmly packed bars are much less likely to fall apart in your backpack.
- Bake for 20–25 minutes, until lightly golden around the edges.
- Allow to cool completely in the tin before lifting out and cutting into bars.
- For firmer bars, refrigerate for 30–60 minutes before cutting.
Trail tip
Wrap each bar individually in baking paper or reusable food wrap. They’re then easy to grab from your hip belt or backpack pocket without having to open a whole container.
For multi-day hikes: Because these bars contain peanut butter and other ingredients with some moisture, I’d treat them as a short-term trail snack rather than a long-term shelf-stable food. Keep them cool and use them earlier in the trip.
Easy flavour swaps
🍫 Chocolate & peanut — add 40 g dark chocolate chips after the mixture has cooled slightly.
🍎 Apple & cinnamon — use chopped dried apple and add an extra ½ tsp cinnamon.
🥭 Tropical — dried mango + coconut + cashews.
🍓 Berry & almond — dried cranberries + almonds + coconut.
5. Savoury Roasted Nuts
Makes: about 5 trail portions
Prep time: 5 minutes
Cook time: 15–20 minutes
Ingredients
- 250 g mixed nuts — almonds, cashews, peanuts, pecans or your favourite combination
- 1 tbsp olive oil
- ½ tsp smoked paprika
- ½ tsp dried rosemary, crushed
- ½ tsp ground cumin
- ½ tsp flaky sea salt
- ¼ tsp chilli flakes, or to taste
- Freshly ground black pepper
Method
- Preheat the oven to 170°C.
- Place the nuts in a bowl and add the olive oil, smoked paprika, rosemary, cumin, salt, chilli flakes and black pepper.
- Toss thoroughly until the nuts are evenly coated.
- Spread them in a single layer on a baking tray.
- Roast for 15–20 minutes, stirring or shaking the tray halfway through, until fragrant and lightly toasted.
- Remove from the oven and allow them to cool completely before packing. They’ll become crunchier as they cool.
- Divide into individual portions and store in airtight containers or small resealable bags.
Trail tip
Pack individual portions of around 50 g so you can grab a serving without carrying around an open bag of nuts. They’re particularly good as a savoury snack when you’ve already had enough sweet trail food.
Change up the flavour
Rosemary & Sea Salt
Leave out the chilli and cumin and increase the rosemary slightly.
Smoky Chilli
Add extra smoked paprika and chilli flakes.
Curry Spice
Replace the rosemary and cumin with 1 tsp mild curry powder.amounts of ingredients already sitting in your pantry.
6. Savoury Hiking Muffins
These are soft, filling and easy to eat on the trail, with plenty of room to adapt the flavours depending on what’s in your kitchen.
Makes: 10–12 muffins
Prep time: 15 minutes
Bake: 20–25 minutes
Ingredients
- 200 g flour
- 2 tsp baking powder
- ½ tsp salt
- ½ tsp freshly ground black pepper
- 2 eggs
- 125 ml milk
- 60 ml olive oil
- 100 g grated cheddar cheese
- 75 g finely chopped sun-dried tomatoes
- 50 g chopped olives
- 2 tbsp chopped fresh herbs — rosemary, parsley or chives work well
Method
- Preheat the oven to 180°C and grease or line a 12-hole muffin tin.
- Combine the flour, baking powder, salt and pepper in a large bowl.
- In a separate bowl, whisk together the eggs, milk and olive oil.
- Pour the wet ingredients into the dry ingredients and stir gently until just combined. Don’t overmix.
- Fold in the cheese, sun-dried tomatoes, olives and herbs.
- Divide the mixture between the muffin holes, filling each about three-quarters full.
- Bake for 20–25 minutes, until golden and a skewer inserted into the centre comes out clean.
- Allow to cool completely before packing.
Trail tip
Make these the day before your hike and pack them individually in reusable bags or paper. They’re particularly good for day hikes and the first day of a multi-day trip.
Because they contain eggs, cheese and other moist ingredients, don’t treat these as a shelf-stable snack. Keep them cool and eat them within a safe timeframe.act, it’s particularly useful when you’re trying to keep your pack weight down.
7. Peanut Butter & Chocolate Trail Cookies
Makes: 12–14 cookies
Prep time: 15 minutes
Bake: 12–15 minutes
Ingredients
- 120 g rolled oats
- 100 g smooth peanut butter
- 75 g flour
- 60 g brown sugar
- 50 g dark chocolate chips or chopped dark chocolate
- 50 g butter, softened
- 1 egg
- ½ tsp baking powder
- ½ tsp cinnamon
- ¼ tsp flaky sea salt
- 1 tsp vanilla extract
Method
- Preheat the oven to 180°C and line a baking tray with baking paper.
- Beat the softened butter, peanut butter and brown sugar together until smooth.
- Add the egg and vanilla and mix well.
- In a separate bowl, combine the oats, flour, baking powder, cinnamon and salt.
- Add the dry ingredients to the peanut butter mixture and stir until combined.
- Fold in the chocolate.
- Divide the mixture into 12–14 portions and roll into balls. Place them on the baking tray and flatten slightly with your fingers or the back of a spoon.
- Bake for 12–15 minutes, until the edges are lightly golden.
- Leave them on the tray for 5 minutes before transferring to a cooling rack. Allow them to cool completely before packing.
Trail tip
Make these a day or two before your hike and store them in an airtight container. Once completely cool, pack individual cookies in small reusable bags or wrap them in baking paper.
They’re particularly good for the afternoon slump when you want something sweet with a bit of substance.
Easy variations
Peanut Butter & Raisin
Leave out the chocolate and add 75 g raisins.
Chocolate Orange
Add the finely grated zest of one orange.
Coconut Crunch
Replace 25 g of the oats with 25 g desiccated coconut.
What Makes a Good Hiking Snack?
When choosing food for a hike, think about more than calories.
A good trail snack should ideally be:
Lightweight – You don’t want to carry unnecessary water or packaging.
Easy to eat – Snacks that can be eaten while walking are especially useful.
Energy dense – Nuts, seeds, dried fruit and other compact foods can provide plenty of energy without taking up much space.
Shelf stable – For multi-day hikes, choose foods that don’t require refrigeration.
Enjoyable – This one is often overlooked. If you don’t enjoy eating something at home, you probably won’t enjoy it halfway up a mountain.
Make Your Own Hiking Snacks
Making your own hiking snacks is a great way to experiment with flavours and find out what works for you.
Start with a few simple ingredients, make small batches and test them on your shorter hikes before relying on them for a multi-day adventure.
And remember that snacks are only part of your trail food plan. For longer hikes, you’ll also need proper meals that provide enough energy and nutrition for the days ahead.
That’s where Hungry Hiker comes in.
Our dehydrated hiking meals are designed to be lightweight, easy to pack and simple to prepare on the trail — so you can spend less time worrying about food and more time enjoying the adventure.